
In our last installment of this series, we learned about the different kinds of controllers that Umbraco provides us. Now we will delve into user and member management, and how to code member authentication & authorization into your Umbraco website.
Security
 Umbraco has two distinct user types. User security for the back office and member security for the front end. Both are quite easy to work with and are built upon Forms Authentication. One of the great things about Umbraco is its versatility. For either users or members, you can use a different provider than Forms Authentication or you can even roll your own. User Authentication works right out of the box without you having to do any real work, but member authentication & authorization will require a bit of custom coding on your part. For readers that haven't done much with security, authentication is simply the process of proving something to be valid, whereas authorization defines what something has access to.
Securing the Back Office
I’m not going to talk a lot about back-office security because that is the main topic of my next article, but I will give a basic overview. Umbraco back office authentication authorization is built upon ASP.Net Identity, which most of us should be pretty familiar with at this point. Being built on Identity means that it can support any OAuth provider that you throw its way. There is one important thing to note. Umbraco released a GitHub project called UmbracoIdentityExtensions, and I’ve tried working with it in v8 it is rather buggy to say the least at this point. I’m pretty sure that they will release something else down the road.
Securing the Front end
Frontend security in Umbraco is straightforward and can be handled absolutely any way that you please. Umbraco really does a lot of the heavy lifting for you! I’m going to keep it as simple as possible in this tutorial.
We will need to do the following first:
- Create a login page.
- Create a registration page.
- Create an authentication error page for when the user fails to authenticate correctly or doesn’t have sufficient privileges.
- Create a couple of secured pages that are only accessible to certain types of users.
I believe in making code as modular as possible, so the login page will just be of the “Simple Page” document type & we will create a login macro.
So, let’s get started:
- Login to the Umbraco Backoffice
- Now we need to create our member groups. click on Members, right click on Member Groups, and click on Create, now simply type Admin and click Save.
- Follow the same steps from above and create a Member Group called Standard.
- Right click on Home and create the following pages and put whatever content in there that you like for the moment:
- Administration
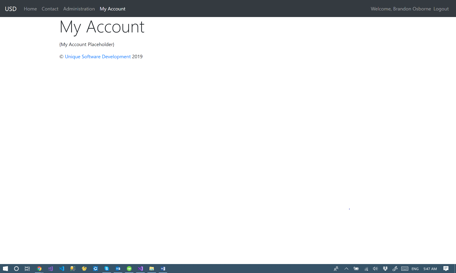
- My Account
- Login
- AuthError
- Now Click on Administration, Click on Actions, Click on Public Access
- For Select the groups who have access to the page Administration, click on Add and select the newly created Admin group.
- For Login Page select the Login page that you created above.
- For Error Page select the AuthError page that you created above.
- Click Save
- Now Click on the My Account, Click on Actions, Click on Public Access
- For Select the groups who have access to the page Administration, click on Add and select the newly created Admin group, then add Standard.
- For Login Page select the Login page that you created above.
- For Error Page select the AuthError page that you created above.
- Click Save.
- Have a look at our site now…

- It looks like our Macro and Document Type aren’t smart enough to magically figure out when a page that we’ve created should not be displayed. The programmer of this site should be shot! Oh wait… never mind. Everyone makes mistakes. 😊 Let’s kill two birds with one
 stone, by updating that macro right now to intelligently display a login or logout button. and we’ll quickly discuss how to hide pages that you don’t want in the navigation menu. So, if you click on the Administration or My Account page, you’ll see that it redirects you to our presently completely useless Login page. Let’s go ahead and remedy that.
 - First let’s go back to the backoffice, go to settings, click on Document Types, select Simple Page, and click Add property with the following properties:
Name: Hide From Navigation Menu - Click Add editor, then select Checkbox, accept the default values and click Submit.
- Click Save.
- Click Content, Click Auth Error, click “Hide From Navigation Menu,” and click Save and publish.
- Do the same thing for Login
- First, let’s deal with those pesky weird items in the navigation menu issue. To fix, that… all we need to do is reference our newly created property in our ~/Views/MacroPartials/Navigation.cshtml partial, like so:
I know that a magician never reveals his secrets, but the real magic happens here:
@{ var selection = Model.Content.Root().Children.Where(x => x.IsVisible() && (bool)x.GetProperty("hideFromNavigationMenu").Value() == false).ToArray(); }
- Now that is finished, we will go ahead and create that custom login header for the navigation menu. For the moment, we will only worry about when the user is not logged in. Start by creating a partial view in the ~/Views/Partials directory called _LoginHeader.
- This will be a pretty simple partial where you simply display a different link if a user is logged in or not & it will look like this:
- Now we simply need to add the partial to our navigation menu macro partial (~/Views/MacroPartials/Navigation.cshtml). You do this by adding the following line just before the closing div of your navbar:
@Html.Partial(@"~/Views/Partials/_LoginHeader.cshtml") - Finally, let's create the login page. For this, we are going to create a new model, authentication controller, and a macro. Let’s start with the model. Go ahead and create a class called LoginViewModel.cs in the ~/Models directory. The code you write should look a little something like this, but feel free to play around with it:
- Now we just need to add login and logout methods to AuthenticationController.cs and create the login view. We’re not going to worry about creating a logout page, I’m just going to show you how to call an action without Umbraco getting in the way and trying to display a page (quite simple really, but the documentation doesn’t make this apparent).
Here is what your controller code should look like:
Now for the view. For the sake of modularity & simplicity, let’s create a normal MVC partial called _Login.cshtml in the ~/Views/Partials directory and code it like so:
- Once again, in order to keep this modular, we’re going to create a macro for this, so login to the back office and head to the settings tab, right click on Partial View Macro Files, and click New Partial View Macro. Let’s call this one Login and use the following code:
@inherits Umbraco.Web.Macros.PartialViewMacroPage

@Html.Partial(@"~/Views/Partials/_Login.cshtml", new USD.Umbraco.Article3.UI.Models.LoginViewModel(string.Empty, string.Empty, this.Url.ToString()))
Macros do not allow you to pass in models, only Umbraco parameters.
- At this point, you should be able to login. Don’t forget to create a member in the back office. Page access is automatically handled by Umbraco, which follows the rules we set up before.
- If you’ve logged in, logout and try logging in again without any username or password. You’ll notice that it totally bypasses our validation rules specified in the model. This is because we haven’t installed unobtrusive ajax and we need to make a couple of changes to the web.config file.
- First, let’s install the necessary javascript files. Type the following two commands into Package Manager Console:
- Install-Package jQuery.Validation
- Install-Package Microsoft.jQuery.Unobtrusive.Validation
- Now, we’ll need to update ~/Views/Master.cshtml. Add the following code after the base jquery script:
<script src="~/Scripts/jquery.validate.js"></script>
<script src="~/Scripts/jquery.validate.unobtrusive.js"></script>
- You would think that it would work now, right? Well, that would be wrong. 😒You need to add the following lines to your web.config file:
<add key="ClientValidationEnabled" value="true"/>
<add key="UnobtrusiveJavaScriptEnabled" value="true"/>
This is something that confused me initially. These two lines were already included in earlier versions of Umbraco. They were set to false, but they were included.
- Voila! Just like that any validation settings that you specify in your models will be enforced in the UI.
- Now, we just need to do the member registration page and we can call this lesson a wrap. First, we’re going to once again create a new macro. So, once again, go to the back office, go to settings, right click on partial view macro files and create a new one called RegisterForm leave it blank for the moment, & click save (because I prefer working in Visual Studio – don’t forget in a few moments to show all files and include it in the project).
- Now go up to Macros, click RegisterForm and just click “Use in rich text editor and the grid” and click save.
- Now we want to put this somewhere, so you’ll want to go to the Content tab, right click on Home & Create a new “Simple Page” called Register.
- Click “Hide from Navigation Menu” and then simply go up and include our new macro and hit save.
- For the login, we took a more traditional Forms Authentication approach. For this page, however… I’m going to do something a little more “Umbraco-centric” and we won’t even have to add a controller, because really… all of this functionality is already baked into Umbraco, so there is no need to even create a controller. I chose to hand code the login page to show just how easy it is to customize Umbraco to suit your needs. So, open ~/Views/MacroPartials/RegisterForm.cshtml and paste the following code:
- You would think that it would work now, right? Well, that would be wrong. 😒You need to add the following lines to your web.config file:
Summation
In this article, we covered just how easy it is to configure authentication and authorization in Umbraco 8. It isn’t terribly dissimilar than the way it has worked since version six. We also covered simple and unobtrusive form validation. I didn’t complete the “My Account” page on purpose to give readers the opportunity to try to solve this on their own. In the the source for article 4, I’ll include some code for the “My Account” page. It is important to remember that member authentication in Umbraco is based on Forms Authentication with very few mild differences.
The full source code for this article can be found at: https://github.com/coderpros/blog/tree/master/CoderPro.Blog.Umb.Art3
As always, the username & password to the Umbraco back office is:
Username: info@coderpro.net
Password: Q1w2e3r4t5y6!
If you have any questions or need any help with your programming project, please feel free to drop me a line anytime, by using our contact form.
Coming Up Next Time
In the next lesson, we will start working on some more advanced topics. We will use IdentityServer4 ASP.Net Core to write a custom membership provider that allows for single sign on third-party authentication for both the back-office and members. We will also extend the back office so that you can manage IdentityServer users directly from the back office. Until then: Happy Coding!